
How to make a pinch pot video?
from The Fitzwilliam Museum in Cambridge
KS2 Art
National Curriculum: Primary Art.
Learning Objectives
Pupils should be taught: to increase their proficiency in the handling of different materials
1. identify the materials used in the production of earthenware pottery
2. identify techniques used in producing clay forms
3. create a simple pot using the techniques outlined
4. decorating that form
5. realise that there are contemporary artists who create art as a living.understand the motivations behind the choice of art as a career
6. to review what they and others have done, say what they think and feel about it and what they might change
Suggested Classroom Activity
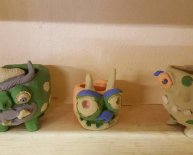
Fitzwilliam education staff member Alison Ayres demonstrates how to make a clay pinch pot with a lid that is then decorated as a creature. This workshop is inspired by the large ceramic owl by potter Robert Wallace Martin in their collection.
The six films show the key stages of the clay pinch pot workshop. This workshop was delivered in one ninety minute session with a group of Year 9 pupils. If you wanted to extend the workshop to include painting the pot then the clay needs to be fully dry.
Large ceramic owl by potter Robert Wallace MartinThis short film shows our group of Year 9 pupils exploring The Fitzwilliam Museum ceramic collection and choosing an object to investigate further. They question a curator as to how and why it was made.You can start your workshop by watching this film or go straight to the next video.
Video 1. IntroductionHow to make a pinch pot
An overview of what is covered in this workshop, types of clay and first steps
take a lump of clay
twist it in two equal size pieces
Video 2. How to make a pinch potMake a small pot shape with your claystick your thumb into the centre
pinch and turn
Video 3. Bring the two pinch pots togetherFlatten the top of your potfit the two halves together
smooth the sides with your thumb
Video 4. Adding clay using slip
Make groove marks on both surfaces
apply the slip to the grooves
tidy up the joint with a tool
Video 5. Using tools to add textureTest out different mark making techniquesadd a variety of textures and patterns
Development ActivityYou can also show the pupils the work of potters Mike Eden, Judith Rowe or Paul Scott
Research, Notes and LinksSix workshop videos and one What found video
Share this article
Related Posts

Latest Posts


